
Deleting rows is one of the most common tasks a user will undertake in Excel which therefore means you need to learn how to master this. You may need to delete rows because it contains old data and is no longer needed. Another reason could be because you may have combined different datasets together and want to delete duplicate rows. This post will teach you how to delete rows in Excel by using three simple methods. These are by using the:
- Excel ribbon
- Mouse
- Keyboard shortcut
Before I dive straight in and show you the three different ways of how to delete rows in Excel, it is important to understand the rule of how Excel deletes rows. The rule is:
- When you delete a row, all the cells below the deleted row shifts up one row
1. How to Delete Rows in Excel using the Ribbon
To learn how to delete a row in Excel using the ribbon, then follow these steps.
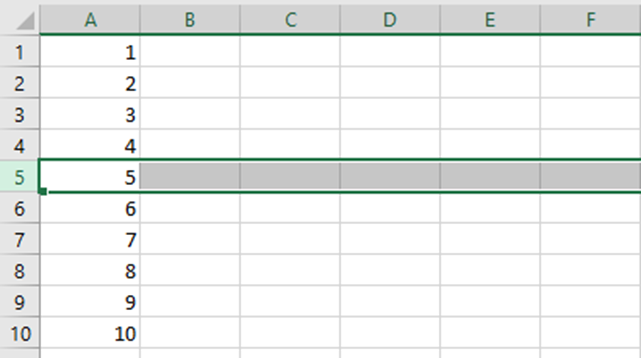
- Select the entire row where you want to delete a row by clicking on the row header number. In this example, I want to delete row 5 so I select the row header 5.
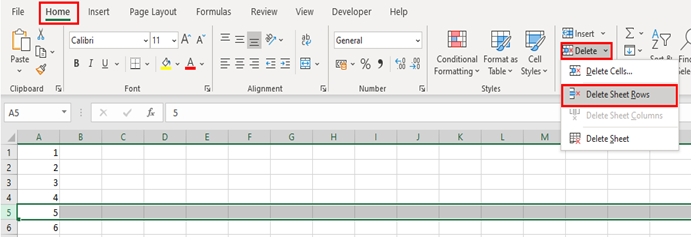
- Go to the Home tab and under the Cells group click on Delete. You can also select the arrow next to the Delete button and select Delete Sheet Rows from the menu.
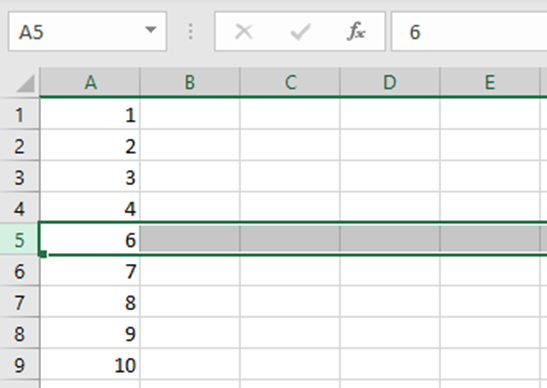
- Row 5 has been deleted. Consequently, the cells below the deleted row have shifted up one row.
2. Deleting Rows in Excel using the Mouse
To delete a row using the mouse, then follow these steps.
- Select the entire row where you want to delete a row by clicking on the row header number. In this example, I want to delete row 5 so I select the row header 5.

- Right-click your mouse and select Delete from the shortcut menu.

- Row 5 has been deleted and therefore all the contents below have shifted up one row.

3. Using a Keyboard Shortcut
To delete a row using keyboard shortcut keys then select the entire row by clicking on the row header number. Then press Ctrl + Shift + the minus sign (-).
How to Delete Multiple Rows in Excel
If you want to delete multiple rows, then simply select the row header numbers first and choose one of the three methods mentioned above. For example, I want to delete four rows from row 4 so I select row headers 4 to 7.
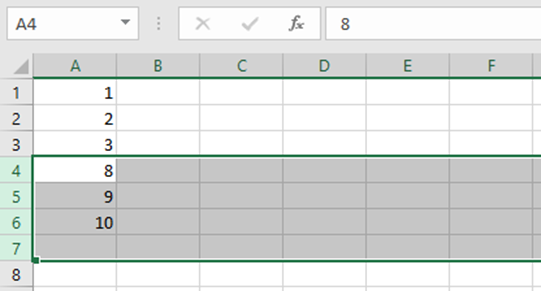
Rows 4 to 7 have been deleted. Notice that the rows below have now shifted up by four rows because four rows were deleted.
I hope you enjoyed this post on how to delete rows in Excel. Moreover, I hope you have learnt something new. If you have any questions or feedback then please write a comment below and I will get back to you.
Style Meets Spreadsheets: The Top Excel T-Shirts for Data Lovers!
Ready to wear your Excel prowess with pride? Our Excel-themed t-shirts are a stylish ode to your love for spreadsheets. Whether you’re a data aficionado or simply appreciate smart fashion, these spreadsheet t-shirts are your perfect fit. Don’t wait – click below to browse our collection and make a statement with these Excel-inspired t-shirts!
Etsy Shop: API reponse should be HTTP 200API Error Description: Shared secret is required in x-api-key header.
Do you want to take your Excel Skills to the Next Level?
If you are a beginner in Excel and want to take your Excel skills to the next level then please read my book Excel Bible for Beginners: The Essential Step by Step Guide to Learn Excel for Beginners. This Excel book will teach you all the fundamentals of Excel which will therefore enable you to become an advanced user.
Some of the things you will learn from this book includes how to:
- Use the Quick Access Toolbar
- Change font styles
- Wrap and merge text
- Format numbers
- Apply borders
- Apply cell styles
- Use the Format Painter tool
- Freeze rows and columns
- Hide/unhide columns and rows
- Copy, paste and cut
- Use the Excel Find and Replace tool
- Use the Excel Text to Speech function
- Create charts and format them
- Create formulas
And much much more!
Below are some reviews from people who have purchased this book.


To learn more about this Excel book and to purchase it from Amazon, then please click either of the buttons below.
