
Are you overwhelmed by a cluttered Excel dataset filled with both empty and partially blank rows? Wondering, “How do I delete empty rows in Excel” efficiently? Fear not! We’re here to guide you through four methods on how to efficiently delete rows in Excel, ensuring your data stays organized and analysis-ready.
Understanding the Challenge: Tackling Empty and Partially Blank Rows in Excel
Empty and partially blank rows can hinder data analysis. It is therefore crucial to explore different methods to clean up your Excel sheets. Deleting empty rows in Excel not only enhances the visual appeal of your data but also streamlines analysis by eliminating irrelevant information. Similarly, knowing how to delete empty rows in Excel ensures your datasets are concise, improving overall data accuracy.
Now I will provide you with four great Excel hacks with step by step instructions on how to delete multiple empty rows in Excel.
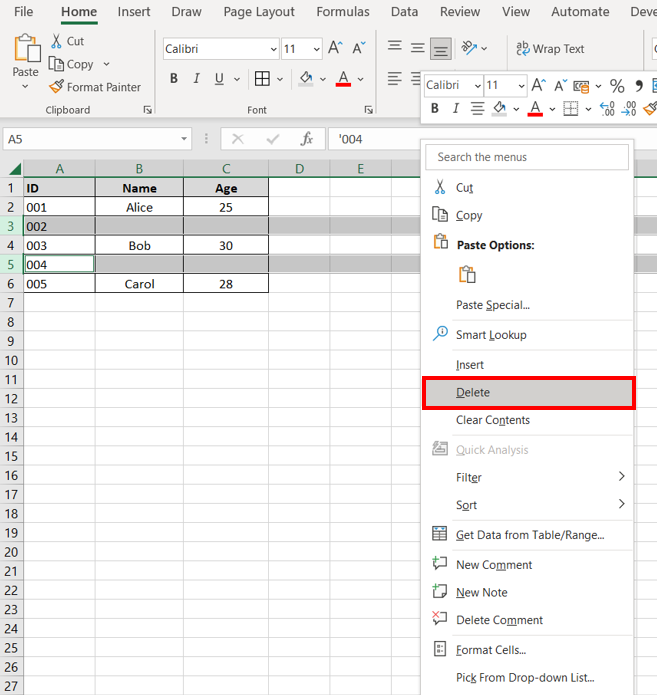
1. Manually Delete Empty Rows in Excel
- Identify the rows containing both empty and partially blank cells by scrolling through your dataset.
- Manually select the row numbers corresponding to the targeted rows.
- Right-click and choose “Delete” to eliminate the selected rows.
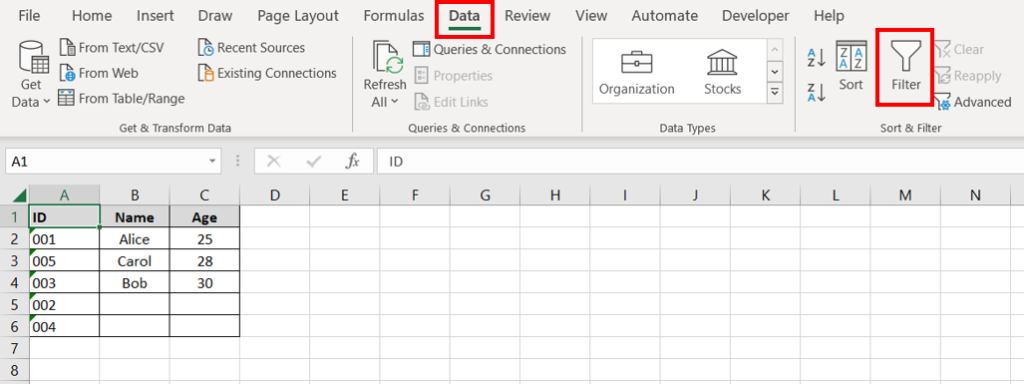
2. Using the Filter Function to Delete Multiple Empty Rows in Excel
- Insert a filter on the header row by selecting a cell anywhere in the dataset and then going to Data > Sort & Filter > Filter from the Excel ribbon.
- Click on the filter icon in the header row and then click on “Sort A to Z” or Sort “Z to A” if a column containing text is selected, or “Sort Smallest to Largest” or “Largest to Smallest” if a column containing numbers is selected.
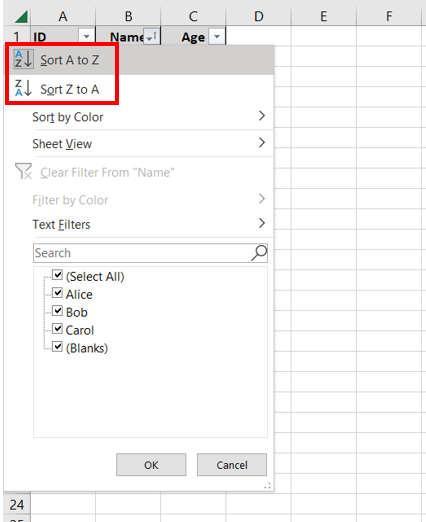
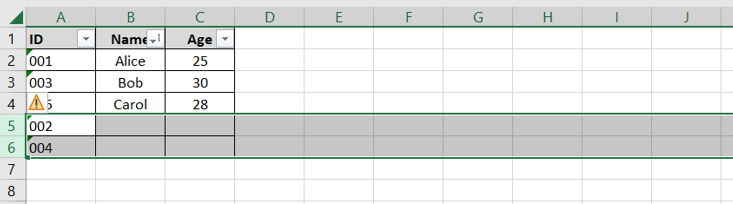
- The data will be sorted so that all the non blank cells are at the top and the blank cells at the bottom.
- Manually select and delete the visible rows containing both empty and partially blank cells.
3. Using Formulas to Delete Multiple Empty Rows in Excel
- Insert a new column and use a formula to identify rows with partially blank cells. For example:
=IF(COUNTBLANK(A2:C2)>0, "Delete", "Keep")
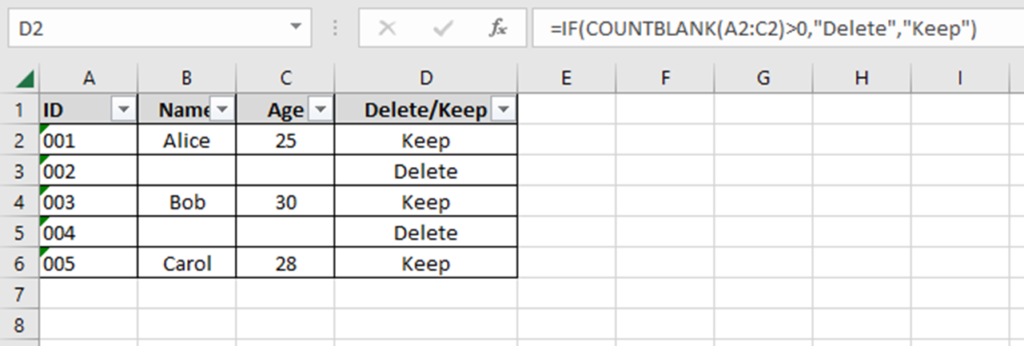
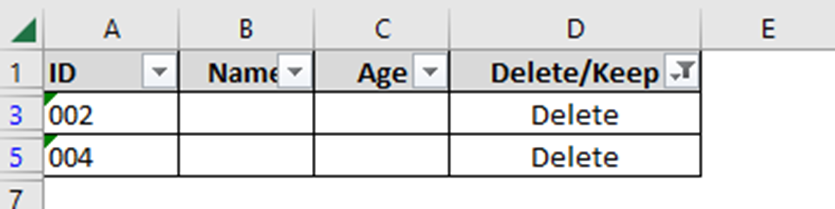
- Filter by the “Delete” value and delete the selected rows.
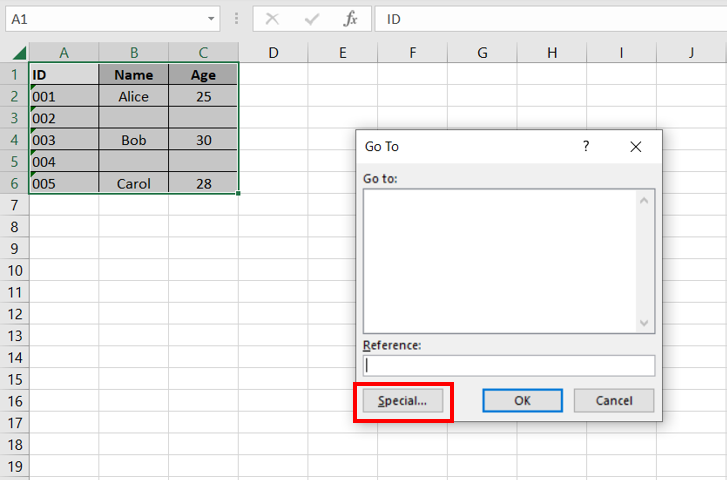
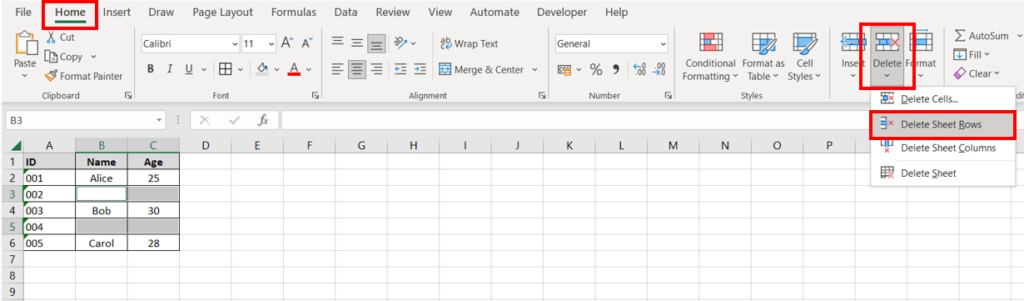
4. Using the GoTo Special Dialog Box
- Select the range of your dataset.
- Press Ctrl + G to open the “GoTo” dialog box.
- Click on “Special” to open the “GoTo Special” dialog box.
- Choose “Blanks” and click “OK.” Excel will select the blank cells.
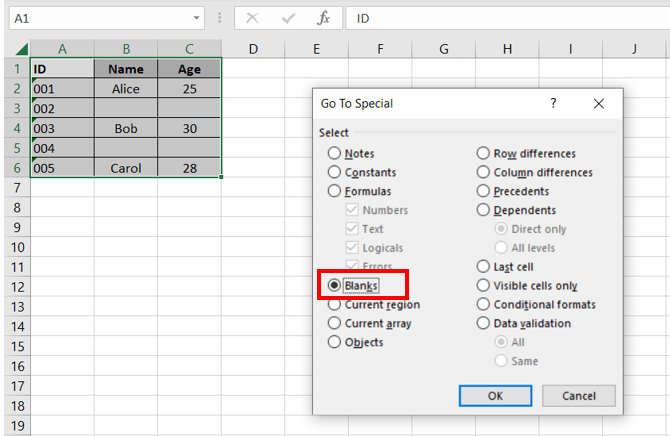
- In the ribbon, go to Home > Cells > Delete > Delete Sheet Rows to delete the empty rows.
Conclusion: Empower Your Data Management
In conclusion, mastering various methods to delete rows in Excel empowers you to maintain a clean and efficient dataset. Whether you prefer manual deletion, leveraging filters, using formulas, or the GoTo Special dialog box, these techniques ensure your Excel sheets are optimized for effective data analysis.
I hope you enjoyed this tutorial on how to delete multiple empty rows in Excel. Please leave a message in the comments section below. I would love to hear your feedback or if you have any other methods of deleting empty rows in Excel.
Excel in Every Aspect: Elevate Your Wardrobe with Excel T-Shirts!
Level up your wardrobe with our Excel-inspired t-shirts! These aren’t just shirts; they’re a statement of your passion for spreadsheets and data mastery. Don’t settle for ordinary – click below to explore our collection and wear your love for Excel proudly!
Etsy Shop: API reponse should be HTTP 200API Error Description: Shared secret is required in x-api-key header.
You can also explore our Excel shop for an array of goodies – from insightful books and engaging eBooks to stylish mugs and more! Your journey to spreadsheet mastery awaits. Click here to discover, shop, and Excel in every aspect of your data-driven life!
